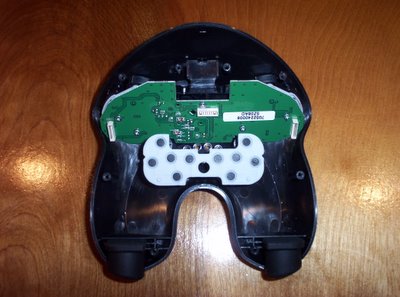
The Alphagrip disassembled
So, yeah, my Alphagrip typing skills are not too quick yet, so I got curious and took the Alphagrip apart. I thought I'd post some pictures, since I know there are those of you interested in seeing the guts of expensive/exotic gadgets (it is really a sick habit - you should get help), I thought I'd take a few pictures. It is a pretty simple and elegant little package, basically a two-part 3-dimentional keyboard connected by three connectors and eight screws. The type of buttons and the soft membrane remind me of a blackberry's thumb-board (yes, I've taken one of those apart also).
This is the front half of the Alphagrip. Attached to it are the circuit board for the front upper keys, the lower-front keys and membrane, and the rubber feet. You can also make out the three white connectors that connect the front to the back.

This is the back half of the Alphagrip. This houses all the electronics for the back keys, the front lower keys, and the USB ports. You can see the wire bundles that connect to the three white connectors on the front half. You can also see four green LCDs, which indicate (from left to right) the status of NumLock, Pause, CapsLock, and FunctionLock.

By the way, if you have an AG-5, and plan on taking it apart, do it with the controller face-down. Everything in the back half will stay together, but the keys and membrane in the front half are loose when separated from the back half.
And in case you were wondering, yes - I did get the AG-5 back together without incidient, and yes, it still works.
--Adrian


0 Comments:
Post a Comment
<< Home